Showing posts with label Works in Progress. Show all posts

Saturday, August 27, 2011

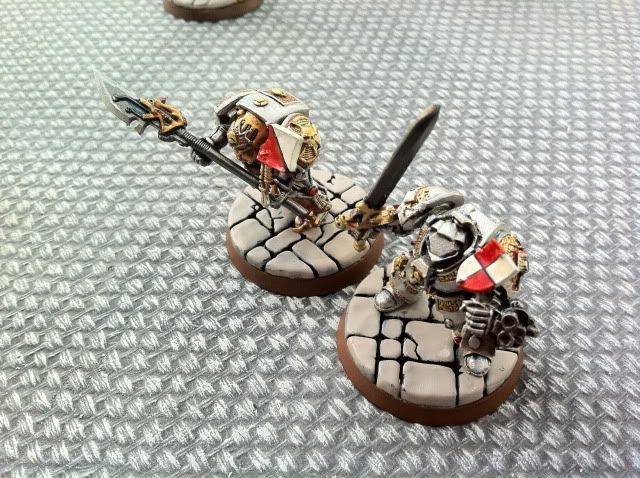
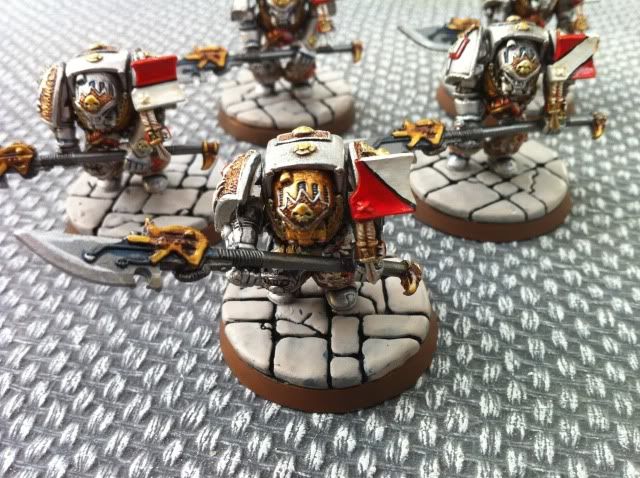
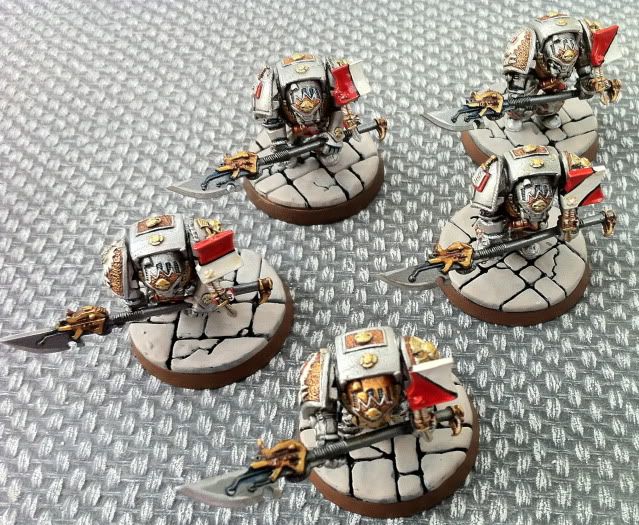
More Grey Knights

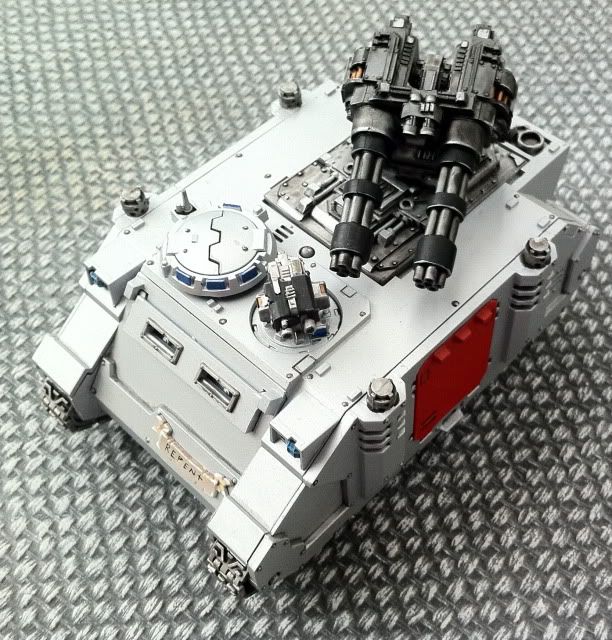
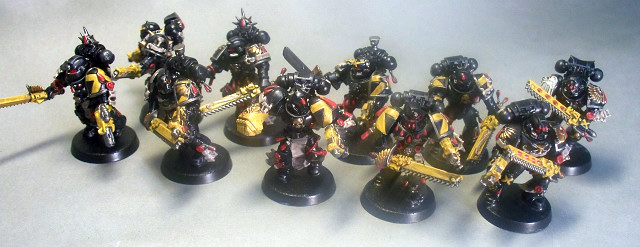
I have steadily been increasing my GK numbers as time allows. As my main focus is my Warhammer Empire Army (close to being done) at the moment, I doubt I will add too much more to these guys apart from perhaps a Land Raider or a few Dread for longer range firepower. Here is the first lot.

Old 1987 style GK with a more modern counterpart. The sizing has held up quite well over the period of 20 odd years.


I made the colors all the new style rather than the aged. The only point of difference being the Gold Helmet for the Squad Leader for the RT era figures.    


I kept the shoulder shields (the originals so I was quite lucky to get 5 all together)


Shoulder detail

Razor awaiting decals. The weapon is a Psi Cannon

For my regular readers I will do some fluff for the Lamenters and a more indepth post of the Stormraven next week. Enjoy.

Saturday, August 20, 2011

Big Bird....

One of the final projects as I run the Lamenters towards completion and then gaming is the Stormraven.

The particular model was designed to go with some Death Company that I have a feeling I will get redone at some stage as I am not that happy with them. But I was happy with the Stormraven itself.

I chose plasma as it is my favorite... and of course I went with multi-melta as it is almost whats needed. I did the Heavy Bolter sides just for fun, and I use it with them from time to time.

Anyway... here is Stormraven Arterial in her glory.


Sunday, July 17, 2011

Fatidus Glorium.... Chaplain Dreadnought

Well finally the centre peice of the army.... well one of two actually.

I have a background and fluff for him but thought this was as good a place and time to put him in here as I have not updated in some time...

Enjoy.


Thursday, June 16, 2011

Chapter Master Lamentors

Finally....

In Imperial Armor 9, the Chapter Master for the Lamenters is given a brief blurb and we are told that he wears gold and chequey armor. (Strange way to say chequer pattern, but meh). We are told that he is blonde and we are given an overview of his weaponry and the fact he is the Lord of Ruin. (What this means is not discussed apart from the ability in game it provides).

My take on the Chapter Master... (Malakim) is slightly out of touch with this description due to the fact I prefer to do my Sang Guards and Honor Guards with a Silver focus instead of a Gold one. Yellow and Silver suit each other ok as colors and I wanted my Sepluchre Guard (Sanguinary Guard), to be a different feel from the  Blood Angels but continue the theme of the BA heraldry and design process.

Here he is. My only downfall with the figure is I cannot secure anymore of these bases... the company having closed. But I think it suits him well!

I should note too.. I designed the character and the parts, but Maggy from Redstick did the paint for this and the Lamentor. (I am good... but I am nowhere near that good). Next week we begin with some finished GK elements.

Base (unfortunately I only have 1 more of these... probably to be used for a future figure)


Thursday, June 9, 2011

Long time coming update (Lamentor)


The Lamentor. (Lamenter's version of the Sanguinor).
Parts are DA Veteran Body, SG chest, DA veteran head with drilled out face to make blank.
Lightning Claw from SM commander sprue, Book from DA Veteran Sprue.
Shoulder pads are from SG sprue and so is backpack.

Color Scheme is black and white split quatered.
Hi all!

Sorry havent been posting work work work.....

Anyway here is an overdue update of my Lamenters! Enjoy! I will write a background fluff part and also do some more action shots to show the figure in a better light with others.


Side view showing type VI armor pad and black quatered side.
 

Wednesday, March 23, 2011

Updates on Lamentor and Malakim!

As previously discussed here is my mock ups for my Chapter Master so far and also my "Lamentor".

The Chapter Master is taken directly from IA 9. Although I have chosen him to be representative of a general Chapter Master or Captain figure for my force. (His name is Malakim and although I am finally thrilled to have a special character that is Lamenters only... his stats and abilties are a little lack lustre. Plus why would FW do a figure for a codex that's Sagnuinary Guard has Jump Packs and do a Chapter Master WITHOUT one!....)


Fear me! I am headless!


The second figure is the Lamentor. My version of the Sanguinor for the Lamenters. If you have read my Black Blood Fiction the background is there being set up for this to be a construct of the Lamenters NOT Azkaelleon. But I still think it'r rather cool.


Thats right Mo Fo! No face!!!!! ARHHHHHHHHHHHH!


The arm needs to be put upward... but am finding a shoulder pad rather difficult to source that will fit and look suitable.


Dam it stand still mister.
Comments appreciated.

Monday, February 7, 2011

The Lamentor Planning Stage and Execution.

When I first started 40k... back in the day, my favorite figure of all time was the High Warlock Figure from the Old Harlequin Range.

This guy here....

My Favorite RT era Figure.


Unfortunately he no longer graces the fields of battle as a High Warlock, but he remains firmly my all time favorite 40k figure from my youth. I therefore wanted to incorporate something of the figure as in the design process into my version of the Sanguinor for the Lamenters.

I started with this and have come down to the following as a design. Thus far...

1). Body. DA Vetran, legs apart moving forward. robed.
2). SM Lightning Claw from Captain/Commander.
3). SG "Infamous Nipple" Chest.
4). DA hooded head, but with the head drilled out to create an empty hood.
5). SG Backpack.
6). Iron Halo for above figure from Commander SM.
7). DA Book with sash.
8). Braziers from DA.
9). BA SG shoulder pads, the large winged type, identical.

I then looked for a custom base and came up with this;

Liked this base a lot. Unsure if the figure will balance but we shall see.


I sat down and spent about two hours searching bits sites to build the figure and then sat down and tried to imagine how close I could get to what I wanted. It kind of fits, and it echoes the memory of my Old High Warlock...

As for a scheme.... and painting more to come on that... but I can tell you... I didnt stick with the codex. Silver predominates my "Lamentor" and my SG version called the Sepluchery Guard. But you will have to wait till I have finished with them to see how they turn out.

I will leave you with a mysterious project that I hope to finish very fast over the next two weeks.... the one I will refer to as "Vladimir" my Chief Libby. :) The Keeper of the Book of Counted Sorrows.

Sunday, December 26, 2010

Death Company Lamenters

Well another finished section. The Death Compnay as I previously wrote about for the Lamenters is one of the more BA elements of the chapter. It is designed around the Death Company for the BA but I wanted it to have a slightly different thematical element. I had considered alabaster armor but it seemed not as keeping in line with the fluff.

I went with a yellow and black scheme for a few reasons

1). To keep the colors tied to the force generally
2). To ensure that it still had that BA styling in it as a successor chapter
3). I wanted to keep away from the bumble bee type color scheme

The DC are armed with two inferno pistols, 1 PW and 1 PF. I did 10 of them so I can do smaller squads when required. I also had a Razorback and Rhino completed for them as well to give me even further options for a delivery method.

I do not like the idea of a JP death co, I guess it has more to do with control of the force than anything else. The biggest problem is controlling the dc and making them head toward what you want them too. On foot, at least you have that ability. I also am not convinced the only delivery method is a LRC or LRR as is most probable. Unfortunately with only 1 LR of any type it becomes a fire magnet for all forces, and I thought it was better served as a Terminator delivery option or at the least standard assualt squad option.


Friday, December 3, 2010

Memories of Draco...

This figure is one of my favorites now... He was also one of the first models I collected... way back when.

When it came time to get him painted I was quite excited and impressed by how he came out. The entire thing though with this figure is as its an early sculpt it is nowhere near as perfect as I would like. Citadel was not known for its great sculpts in the late 80 and early 90 period. Its also one of the rare sculpts that uses bionics and has terminator armor.

Draco as I called him... was based off the Ian Watson novel of Inquistior.... the same figure appears on the front cover. However his armor is blood red. I wanted yellow to match the Lamenters scheme. The blend seems quite good actually and I am rather impressed with him. The skin is deliberately dark and grey... I wanted this to show that humanity is different... and as a psyker... its part of his mutation. It is also a silent nod to Grand Admiral Thrawn from Star Wars.

Ordo Xenos Inquisitor Draco in Terminator MKVI Armor. Note the slightly rounded Shoulders.


Draco is armed with a combi weapon, in this case I think orginally it was a combi las and bolter, however I use it as a combi melta or flamer. He has his force weapon strapped to his front in a blue scabard and his digital rings... show on his powerfist.

His retinue however require more work before they are completed fully.

Tuesday, November 30, 2010

Nobody expects the Spanish... and trooping the color.

Well another week has gone past... unfortunately I have not had much time in the last week to do a lot on my army. However I have been considering the direction of the army and what I will eventually do with it. Due to the re release of the GK... this presents me with what to do with my Inquistional forces which I am trying NOT to relegate to Apoc missions.

Therefore I have decided to create a modest 1500 to 1750 point Inq force after the next codex is released based off Inq Storm Troopers as a troop choice.

However more about that in the future. For the moment I am now working quitely away on my Death Company and have come up with an appropiate scheme for the Lamenters to show their BA roots, but also add some more flavor to the forces.

Traditional BA Heraldry and Designs are all red, with the Death Company being basically Black. The IA9 specifically shows a Lamenters Marine DC.... in traditional gear of black. The only other Lamenters site I know of... over at Zen 40,000 has done his in alabaster white.

I have decided to go with a more traditional scheme

Standard Lamenter.


Death Company Lamenter


I am still not sure about the scheme.... and the representation above is meant to show the black basic color and the yellow as the accent. Comments are welcomed....

Monday, November 22, 2010

Stern views on Xenos incursions...

As this project is fundamentally a blending of armies with a solid Lamenters base... it quickly became apparent with the new release of the Codex GK... that my Ordo Malleus allies would be relegated to Apoc games. The Inquisition however is not so easily silenced... even by GW.

I decided therefore to base my sternguard vets, on the deathwatch. For those of you unaware, the deathwatch are the space marine fighting arm of the Ordo Xenos. Their entire role is to eliminate Xenos threats to the Imperium under the watchful eyes of the Inquistion.

I speculated that the Ordo Xenos would have deployed forces to Malovlion. From a fluff perspective it makes sense for Crusading Fleet especially one so far out into uncharted space to contain at least a contingent of Ordo Xenos forces. (Plus keeping an eye on the potential heretical Lamenters to ensure they kept their pennance and continued on the crusade after the events of the Badab War)

A ten man squad made up of sternguard seemed to fit the bill nicely... filling an Elite Slot for the army and at the same time ensuring the flavor of the force was retained even if the IST and Inq themselves were banished to Apoc games.

I deliberately picked a diverse range of Chapters. Some known and some others quite obscure but they all share a common thread.

Sergeant. Is a Space Wolf... easily identifiable by his pack markings and wolf totems. I was inspired by the Ultramarines novel where Uriel Ventris joins a squad which has a Space Wolf Sergeant. Also as I am quite opposed to generally open helms the Space Wolf figures tend to lend themselves to open helms and faces.

Heavy Bolter. Heavy Weapon Marine... Lamenters Chapter. I did 3 of the 10 as Lamenters, 2 normal and one with the heavy weapon. It would seem pretty obvious after 80 years of constant crusade that the Lamenters would replace the losses of the squad first and foremost.

Dark Angels. Another haunted chapter, it fitted quite well in the Lamenters theme of loss and something darker sitting in the background.

Blood Angels. The progenitor chapter itself... had to be represented. Here he is the marine with the Sanguine Backpack.

Mortifactors. I had read the Badab war and how at one stage the Mortifactors had refused to fight alongside the Lamentors... it seemed appropiate that in their darkest hour that a single Mortifactor marine should be present. He is distinguished by his backpack made of skulls.

Emperors Swords. A little known chapter the only refernce too is that they were wiped out from within when their recruits and brothers turned on them due to the Alpha Legion's influence. I liked the idea of a final marine... definat yet flawed. Still serving with the Ordo Xenos. I used the Chapter Champion for the figure as it usually is armed with a sword... hence their is an echo of a sword theme.

Ultramarine. Obvious as anything... the roman pose, the cape, the almost arogance of the MKVIII armor amongst his colleagues. A leader amongst men... amongst marines, he serves as a squad leader when I divide the squad or as another Sergeant.

Last and again in the more recent MKVIII armor is a member of the Sycthes of the Emperor. Now lost wiped out to a man by Kraken... another crusading chapter laid low. He was done deliberately in this armor and pose to show how overbearing the Ultramarine was over his compatriots.

The bolters are forge world issue pattern. I picked them as they represent perfectly the Sternguard idea of multiple ammunition on a single bolter. I liked the idea of at least one heavy weapon though, hence the Heavy Bolter.

Click the pics to see a bigger image. I was quite happy with how they came up... the silver deathwatch symbol showing through on each of them. The Red Inq symbol being something slightly different from the typical yellow I had used before. But the bases still lead a cohesive unit to fit the army.

Lamenter, Dark Angel, Space Wolf, Ultramarine and Lamenter
Mortifactor, Scythes of the Emperor, Blood Angel, Emperors Swords, Lamenter

Thursday, November 4, 2010

Captain on the Bridge...

Well here I am yet again with another much delayed Lamentors update. This time its the 5th Company Captain.


I have no background for the guy yet, but I wanted him to be quite unique. How to achieve this.

First I decided to use multiple different sprues. I picked these up from various places and my collections.

SM Captain
Black Templars
SM Devestators
SM Tactical
DA Vetran
DC Assualt

Are all used for the figure. I wanted him at first to be my Chapter Master but with the release of IA9 it became interesting... so I decided on keeping him as a Captain.

http://www.youtube.com/watch?v=0C5Xmgp9A6o

Thursday, April 8, 2010

Pegasus Terrain Part 1. Building the Temple/Church District


My first Idea with a board was to make it modular so I could change things about when I wanted too. But I wanted it to be slightly different than those modular boards that you see out there on other blogs, other sites. Some of the common things which I wanted to avoid;

1. A lot of boards look great, but don't look player friendly. They appear to be built perfectly, like a model in their own right. They astound me with their abilities to do this, but they also don't look player friendly and I would for a game of 40k struggle to ensure my figures were standing and looked in place in such an environment. My board has to be playable but also look good.


2. Although I am prepared to spend the time on the board and the terrain, it has to be modular enough to pack away. I don't have the room to leave it out.

3). It has to be easy enough to replicate across 30 tiles worth of terrain.


So I started with the idea of a sheet of MDF. All good so far. Most boards for 40k are in a standard 6ft x 4ft fashion. I decided on an 8ft variant. The reasons for this are that I wanted a foot on either side for figures and also to put down your coffee. (I am an addict).

I decided to go with it being modular to the point of breaking the board down into three distinct sections, then doing between 5 and 15 plates for each section. The idea is to have 4x2ft sections (4 of these). Then have Mdf based tiles/plates that can sit over the top and be totally modular.


I have decided to leave the board itself to the last thing. As the board will also be double sided. One side will be this Urban Sprawl I am designing while the other is a more arid style environment for both my Tallarns and also my Warhammer forces.

The board layout will be if you were facing it about to play a game as follows.


On the far left is a foot of space painted black. Then you have a single foot of a specific terrain theme. To accomplish this in as modular way as possible for an city scape/sprawl I went with MDF rectangular sections 290mm x 220mm wide. Then I will continue this across the board for approximately 6ft before running off to another black space. 5 of the plates wide will sit between me and my opponent. Giving a small gap of empty space between us and the start of the terrain. The board will be 6 tiles long x 5 tiles wide.


The board itself will go from a light industrial at one end, through the City scape/Temple/Church distrcit at the other with I hope a canal of some type in the mix. (however on further thought to be better modular type element, the canal will be a strait tile length of 5 wide running across the board, but designed so it has two bridges.)


The Church temple area is to be in ruin, while the light industrial area will have shown a lot of recent habitation. At the far end I will do some light argicultural to show the entrance area to the Hive city. (On further thought I have removed the light agricultural and gone with sparser and sparser ruins to again make it more modular friendly)


So I decided to begin with the central district. Why? Well Pegasus Terrain made it the easiest place to start from a terrain purpose as they make such great stuff.


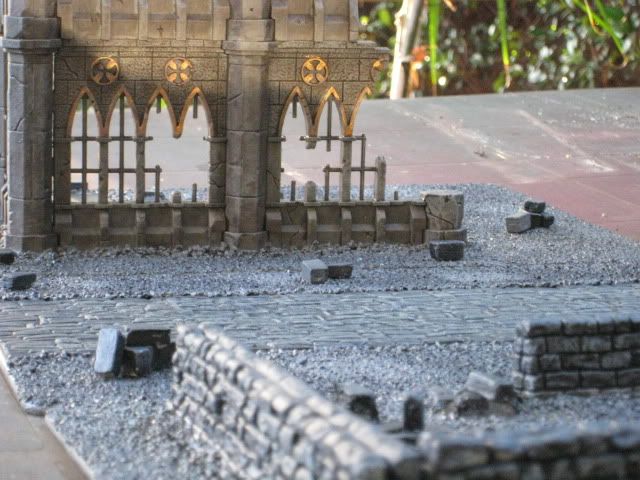
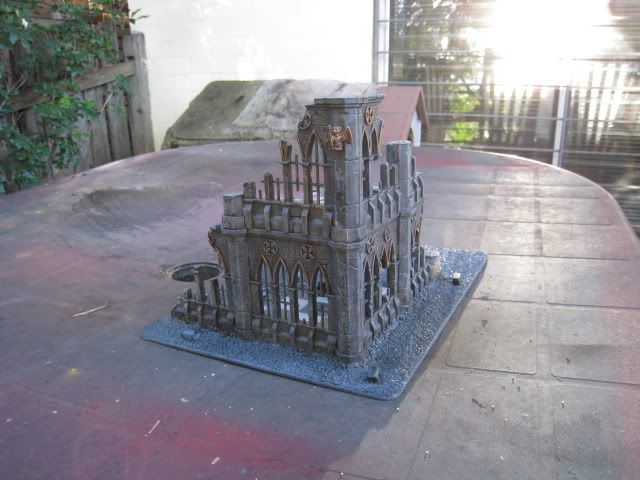
So, I built 5 terrain tiles to begin with. 2 Roads and 2 low walls and 1 ruined building. This how they turned out.


The roads are simple resin tiles glued down and the sides are two different sets of ballast (from sand through to a railway model granular thing) to give the edge where the road hits it, some definition. I then added some bricks again courtesy of Pegasus. (large Grey).


Lastly we have my first building.... a ruined church style corner part. Again pegasus base with my own stuff adding flavor. Card floor tiles etc. Comments appreciated.


My method for doing the building was as follows to get the affect.

A). Preparation and building.

The ruins went together pretty easily, but they needed some work with ensuring they stuck together right and didnt leave large gaps where they join. To get around this as best as I could, I got some model paste (Usually used to build up layers on oil paintings think its called gusso or gesto paste.) Then I added the joiner covers and did a layer of the paste over them to try and obscure most of the gaps.

B). I sat the completed peice down on the MDF and then measured each side of the building itself and cut out a piece of 1mm thick card stock for the bottom tiles. Mine was 7inches by 6 inches. I divided this into squares and inked the lines up and then cut it so my square was done in two parts. I then used a knife to cut along the square tile edges so it would appear that only some of the tiles remained and not a complete square floor. (Using a square also allowed me to get two parts instead of one for another floor on another building).

C). I then glued the floor to the MDF leaving enough room for the wall and more importantly enough room for a 28mm figure to stand on the side looking in. (For practial game purposes).

D). I then glued the building down over the tiles so it sat in the corner with the tiles going about 5mm under the wall. This left a gap looking at the outside of the building (as if it was raised about 1mm off the ground). I again used modeling paste to just fill the gap up completely and then used a large grain of stone all along the edge where the building met the ground. (Secured with about 5mm thick line of PVA glue)

E). I then coated the tiled floor section in denab stone and then colored in the black tiles with chaos black. I also went over the tile joins with a black felt tip pen to give it a straight edge. (The base of the building is now done for tiling work).

F). I then used PVA with a 20mm brush and did the entire surface of the MDF. I then sprinkled sand over the entire thing and left it for about 30mins before coming back and shaking off the excess.

G). I waited 24hrs till I was sure it was dry and then I started to paint it.

Painting

1. Base coat with acrylic grey. (I used simple acrylic color paint for this. That you can pick up at any arts type store. If I had a gun I would have used it, but I used a 25mm brush instead.) It required only two coats, the first covered about everything, the second was to ensure bits that i had missed in crevices etc was done with a smaller 10mm brush.

Then I dry brushed the building over the top with antique white over the grey. Again simple acrylic paint will do. I used a 10mm brush and was fairly heavy handed with it.

2). I got out a size 2 brush and did the gold edging where I wanted it and the gargoyle. I at this time also did the second floor using a similair method to the above mentioned 1 inch floor tiles.

3). I then washed the entire structure including the second story floor with devlin mud. This was the longest and most frustrating part of the process. It is much easier to work in sections so you ensure you get everything. I also think next time I will do this in daylight so I don't miss a spot.

4). I then again lightly drybrushed the entire structure in antique white acylric paint. I was not as heavy handed though this time and I finally touched up any really badly areas I had gone too far over the gold with.

I also super lightly dry brushed up the black floor tiles with the white as it gave them a worn, dusty, gravel trod appearance. The second floor I washed with devlan mud, then went over with denab stone to pick parts out. The wood was snake bite leather I just inked with devlan mund.

The sand base I did in acrylic grey then just dry brushed heavily with a darker grey almost midnight black over the top, to the get the different ground affect and to break it up a bit, I then sponged some of the orginal grey back in a dab type pattern in certain places when it was all dry.


Wednesday, April 7, 2010

Inq Retinue Update


Well another week and another addition to the Inq retinue... Todds realy come a long way as a painter doing these forces. I am quite impressed with them so far.

However I have not been impressed with the efforts of the Marines... being done so far by another service, but alas I will wait till I have them to do more posts on that.

This almost completes the Inq forces and the retinues I will be using for the army.

Their is a terminator Inquisitor to add and 2 more retinue and 5 more arbites and then they are done! (Oh and maybe one more Chimera!).